We covered the fundamentals of static site generators recently. Let’s take a deeper dive into one of them.
Jekyll
Jekyll remains the most widely used static site generator. With Jekyll, you’ll typically work with content in Markdown, a lightweight markup language designed for text formatting. The Liquid templating engine is used to place this Markdown content into the HTML template, and to combine templates representing various parts of a page (say, header, footer and content) in a modular and re-usable manner. It also has support for Sass for those with a preference for CSS pre-processing, and it’ll play fine with libraries like Bootstrap. Also included with Jekyll is an HTTP server which can be used to easily deploy and test your static pages locally.
Importers is a feature which enable an existing site to be migrated to Jekyll with relative ease. For example, you can take an existing WordPress site as a starting point with Jekyll using one of the importers.
If you have a GitHub repository, you’re able to create a GitHub pages site for free using Jekyll. This can be a convenient way to give a polished landing page to your GitHub project.
The big downside of Jekyll – and this applies to most generators – is that it can seem complex at first and is a new technology to master.
If you want to try it yourself, here is the link to install Jekyll.
Installation of Jekyll
You first need to install the Ruby DevKit or you will experience errors. If you are installing Ruby only for the purpose of running Jekyll, Portable Jekyll will give you a full working Jekyll install in less than 5 minutes.
Few easy steps:
To set up your site locally with Jekyll, follow these steps:
- Create a local repository for your Jekyll site.
- Install Jekyll using Bundler.
- (optional): Generate Jekyll site files.
- Build your local Jekyll site.
- Keep your site up to date with the GitHub Pages gem.
- Configure Jekyll.
Does Jekyll generate valid HTML?
Jekyll essentially a parser that converts plain text content written in a special formatting language called Markdown into HTML. These content blocks get inserted into one or more templates to build final output for a static page or a post. Markdown is a styling language used to prepare written content such as blog posts in Jekyll that can eventually be converted into HTML. Markdown allows user to focus on content by using an easy-to-read and easy-to-write plain text format, which can then be converted to valid HTML.
My experience working with Jekyll
Jekyll is widely used Static Generator. I tried working with Jekyll. I followed easy steps to install and run a Jekyll post locally. I first installed Ruby, then used the command prompt to get the desired Jekyll output locally.
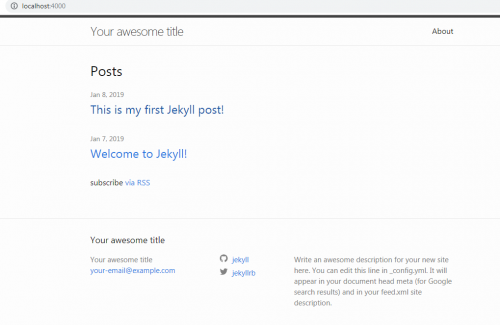
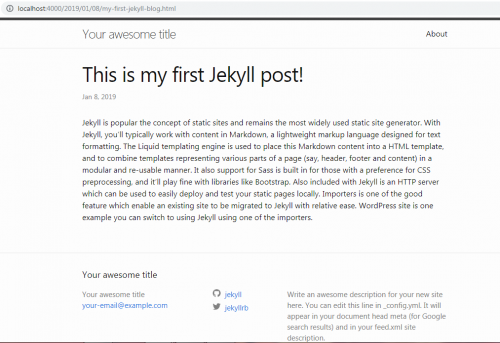
Here are some screen captures to get an idea how the site look like. It is a simple blog post without any graphics.


I transferred all generated files and also post I created via FTP to a server. It didn’t give the desired output shown in above images. For example, the link to the CSS file appears to be broken upon transfer.
During my course of study as a Web Developer I tried many different CMS and installed different software, but working with Jekyll is little different. It has a bit of a learning curve and I think someone before working may need someone to have a little technical background. I am still trying to see what I need to change in the background code when it is transferred to a server. Clearly, something did not work properly.
These are my initial observations on using the tool. You may have different experiences and we look forward to your comments. The biggest issue with using any static generator is that you must generate the entire site each time you make updates (so all the links work). You would then need to transfer the appropriate files to the server each time. In my opinion, there are other tools (such as WordPress) which would seem to be more efficient (although less secure as they interact with a database).
As always, we look forward to your comments.
